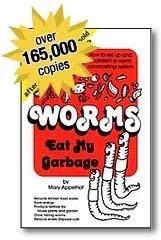
 I am a big believer in vermi-composting; worms do an incredibly efficient job of eating our organic waste and turning it into rich fertilizer – and today for Blog Action Day I will explain the basics of keeping worms alive. I originally posted about worms when I still lived in the desert, but more in generalities. Read that post here. Or you can go straight to the source: everything I know about worms I originally read in Mary Appelhof’s book Worms Eat My Garbage; however, the following directions are in my own words and are supplemented with a dozen years of wormy experience. Keeping worms is easy and makes organic fertilizer on par with bat guano.
You will need:
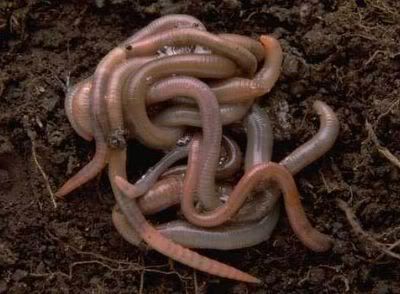
- Worms – Red wrigglers are best because they actually are garbage eaters. I have bought worms on several different occasions, but keep in mind that the worms will be delivered to your house… in a box… alive. So be at home and order the worms when the weather is hospitable. I have also had very good luck with worms that we dug up from under the water bucket in my friend’s goat pen.
- Large container with drainage – A 50-gal plastic tub with a lid will do it. For drainage you can drill holes in the bottom and set the whole thing on top of a couple 2 x 4’s. Or if you live in a very hot or cold place, you can dig a big hole, line the bottom of the hole with rocks, and set the tub on top of the rocks for drainage.
- Shredded newspaper or shredded paper for worm bedding – Offices and schools always have plenty of shreddies to give away.
- Organic kitchen waste – No meat or dairy or fat: these things will attract flies and hence larvae. Eeyew.
To start, set up your worm home before you get your worms. Believe me, you will want to get those worms out of that shipping box ASAP.
You can buy a plastic tub and make a worm house yourself or you can order a pre-aerated worm box with drainage from Mary Appelhof’s site: Flowerfield Enterprises. You can get a 19x16x12 box with one pound of worms for $70 or a slightly larger one for $80. The site says that the larger box will take care of 3-5 pounds of garbage a week, bu personally, I prefer a larger box. A larger container will 1) Make allowance for your mistakes. If a box is nice and roomy, worms can find a spot that will work for them within that box. 2) Accommodate the extra garbage you produce when you go into a cooking frenzy or when you have guests or around the holidays.
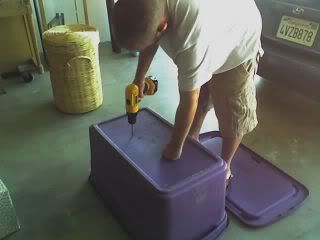 In a harsh climate like the desert, I put the worm box in the ground where it will be insulated from the heat. Here, in Laguna Niguel, a worm box is perfectly fine above ground, but still needs drainage. Drill holes and set the box on top of some planks or bricks.
Fill the box with shredded paper. Water it down and begin adding your kitchen waste. Remember: NO FAT, NO MEAT, and NO DAIRY. I recommend allowing some kitchen waste to stay damp and begin rotting in your worm box before you get worms. The compost you add will barely change, but worms really do prefer older, more rotten garbage. Once you add the worms, that garbage will disappear FAST!
I keep the worm box in the yard because of potential fruit flies, and you will probably find it more convenient to store veggie peelings and zucchini ends somewhere in the kitchen until to have enough to merit a trip outside. There are several ways of storing your kitchen waste without attracting fruit flies. My mother-in-law keeps a sealable plastic container on her countertop. Another friend uses an ice bucket (with a lid that seals well). I like keeping compost in an old bread bag in the bottom of my fridge.
Once your worms arrive, add them to your box and water the whole box contents well. There is no need to stif the worms around, as they will quickly wriggle away from any source of light. They may not seem like very many in comparison to the size of the box at first, but they will reproduce like crazy if the environment is worm-friendly.
And speaking of which, the only tricky part about raising worms is making sure that they don’t get too hot or too cold. Rotting garbage produces heat, so I always make sure that I put all the kitchen waste on one side of the container for a week or so; that way, the two sides are at different times of the composting cycle. Also, always make sure there is plenty of newspaper and keep everything damp. The worms will gravitate to the section of the worm box that is most attractive to them. The worms will eat their way through every single thing in that box and turn it into worm poop, called worm castings. It looks and smells like rich black earth.
Eventually you will want to “harvest” some of the worm castings for fertilizer. There are a couple ways to do this. The easiest is to just take a scoop and add the castings, worms and all to your garden soil – the worms will aerate the garden and the worms in the tub will reproduce and replace the ones you have taken. Or once you start building up a good base of castings, start feeding the worms just on one side for several weeks; the worms will gradually migrate to that one side. Then you can scoop the almost wormless castings out and use it in your garden to grow super veggies.
If you take good care of your worms, your worms will turn your kitchen waste and shredded newspaper into black gold inside of two weeks. I swear it to you; there will not be any food thing recognizable in the tub! Good luck with your worms.